Installing CUCM 11.5
Installing Cisco Unified Communications Manager 11.5
Today we are going to go through the installation steps for CUCM 11.5. I know this version is a little older, especially with CUCM 14 right around the corner but I know there are some people still looking at the older versions. The installation is relatively easy. I'll go through each step and explain what needs to be done.
First, here is a video that I made of the installation if you want to follow along that way.
For the installation we are going to need two downloads from Cisco.com. The first is the OVA template and the second is the CUCM 11.5 ISO. The ISO is actually not bootable so you will need to make it bootable. I have a video on how to do that here.
So head on over to Cisco.com and login with your cisco.com id. You want to go to Software Downloads and then type in the search box "Callmanager." I know, its no longer the actual name but it still comes up in the search. Click on it and then find Cisco Unified Communications Manager 11.5.
From there you are going to find Virtual Machine Templates. Now Click on the latest which is called "CUCM_11.5_vm8_v1.1.ova".
Now click on the back button and find Unified Communications Manager / Cisco Unity Connection Updates. The current version as of the writing of this article is 11.5(1)SU9. You will want to get the first one in the list that is labeled US Export Restricted. This download will take a while depending on your download speed as it is over 5GB in size.
As I stated above, this image will need to be changed to a bootable image and I linked to a video on how to do that above.
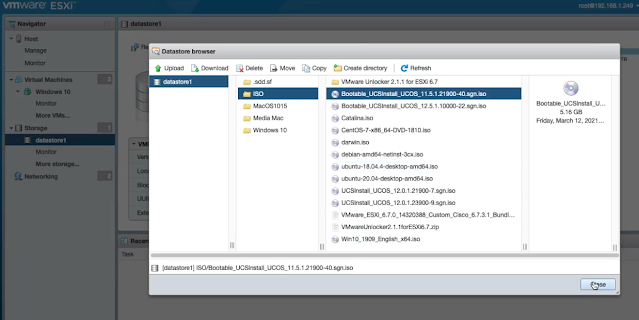
The bootable image you will want to upload to the datastore on the ESXi as show below.
It's time to create the new vm using the OVA template. In your ESXi click on Host and Create/Register VM and click on Deploy a virtual machine from an OVF or OVA file.
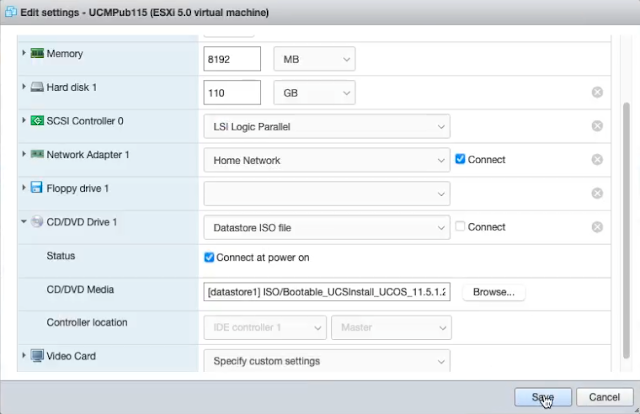
At this point you will also want to uncheck the checkbox for Power on automatically. We will need to map the ISO to the DVD drive before powering on. So click on the Edit Settings and change the CD/DV Drive 1 to Datastore ISO file and choose the bootable image you uploaded.
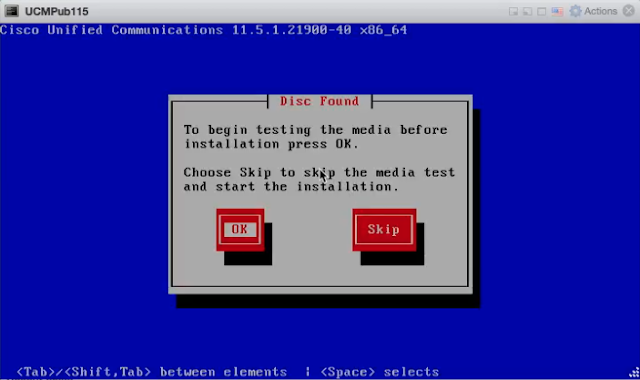
Once that is done you can power on the virtual machine and it will start booting up. The first thing you see is that it found the ISO Image or Disc and it will ask if you want to test the image to make sure it is valid. I have used this image before so I know it is good. But, you may want to go ahead and do that to make sure. I just skipped it.
The next few screens I will just explain without screenshots as they are pretty quick.
The first is to select the install of Cisco Unified Communications Manager and press OK.
It detects the version on the DVD drive and asks if you want to proceed. Press Yes.
It asks if you want to proceed with the wizard. Press Proceed.
It asks If you want to apply an upgrade patch with this installation. Press No.
It tells you that this is the Basic Install option and will ask for configuration information. Press Continue.
It will ask for you timezone. Choose the city closes to you and Press OK.
It will inform you about the NIC speed and ask to proceed by Pressing Continue.
It will ask if you want to change the MTU size. Press No.
It will ask if you want to use DHCP for the IP address. Press No.
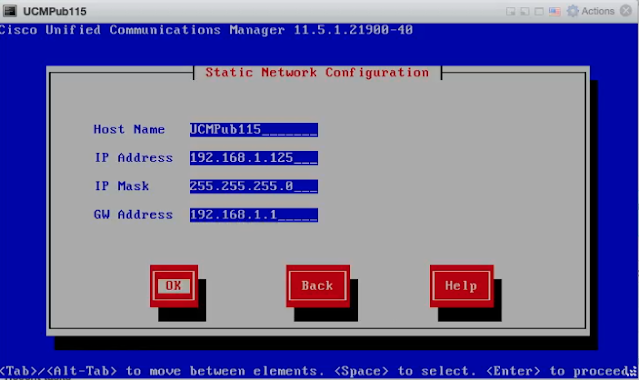
Now it will ask you to enter the hostname, IP address, IP Mask and GW address as shown below.
Next it will ask if you want to enable to DNS client. Normally you would press Yes and put in your domain and DNS IP addresses. This is a lab environment for me and I don't have a DNS server so I'm going to press No and move on. If you are using DNS, which you should do in a production environment, you will need to make sure that the CUCM is entered as a computer in the DNS with the correct hostname and IP address.
IMPORTANT!! --> This will also need to be entered into the reverse lookup zone. If it is not correctly entered into the reverse lookup zone the installation will stop when it tries to enable the network.
Next you will enter the Platform administration username and password. This is the CLI username which you will use if you want to SSH into the server or use the Disaster Recovery. If you are using multiple nodes in a cluster you will need to use the same username and password for this, the security password as well as the GUI administration username and password. All three do not have to be the same but they have to match between nodes in the cluster. I hope that makes sense.
Next is the information for the self signed certificate. Just put in the name of your organization and unit along with your location and State and Press OK.
NTP is next. It is important to note that you can't just bypass NTP. You have to have an NTP server or the installation will not continue. It is also checked when it enables the network and checks that everything works on the network and may stop if it can't access the NTP. I didn't have an NTP server on my network so I just chose a public NTP server.
Next is the Security Password. This is used for Disaster Recover encryption. so if you every have to restore from a backup you will need to make sure that this password is entered on the new installation. It is also used to communicate between nodes in the cluster which is why it has to match between those nodes.
It will ask if you want to enable SMTP. This can be used to email reports and such.
It will ask if you want to enable the Smart Call Home feature. This feature allows the server to email diagnostic information directly to Cisco TAC. The SMTP server in the prior screen will have to be configured for this to work.
At this point the configuration is complete and the install will continue once you press OK. It will take about an hour to an hour and a half to complete the installation. Once complete you will be able to login to the home page as shown below.
And that is it for the installation. You can now start configuring your phones, Route Patterns, SIP trunks, Etc. I hope that this has been helpful. If you have any questions or you run into an issue please comment below and I'll see if I can help you out. Also, please take a look at my other articles and my YouTube Channel. I'm sure you will find something that will help you out.


nerc cip services in usa
ReplyDeleteWe provides a set of standards for organizations to follow. The CIP standards require the utilities to establish a set of security measures. These standards include set levels for performance, risk management and entity capabilities. These standards provide higher security to the BPS by increasing security measures. Ampcus Cyber helps client reach their security goals by providing Software as a Service SaaS.